How to create VPC(AWS) and subnets(Private and Public) step-by-step
Step 1: In the AWS management console create the VPC and tag the name for your VPC

Step 2: After creating the VPC create two Subnets one for public and other for private. And enable auto-assign public IP for public subnet.


Step 3: Create an internet gateway, and attach to VPC


Step 4: Create two route table, one for the public subnet and one for private subnet after creating edit the route as per your requirement.


Step 5: Click the subnets association and add the following address based in the public and private subnets and save the following association
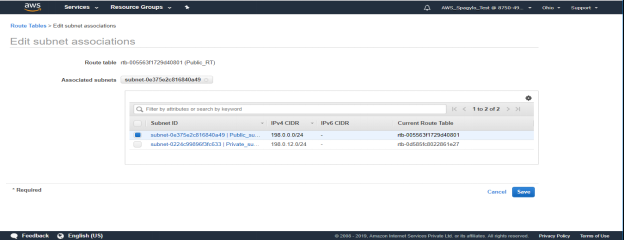
Do the same process for the private subnet in the route table to associate with the VPC
In the public subnet edit route and target as the Internet gateway give the IP as 0.0.0.0/0

Step 6: Create the NAT gateway for the public subnet and add route table entry as 0.0.0.0/0 select target as Nat Gateway in private subnet route table and save it. By default, EIP will be allocated to NAT Gateway


Step 7: After completing all setup in VPC console Launch the instances in public and private subnets, configure the security groups to check the VPC setup.


Step 8: you can open the remote machine to ping whether the setup is done correctly
